Getting Calibration Right
This article was original published in Trenchless Technology Magazine's 2025 HDD Guide.
What is Signal Strength?
To understand calibration, we first must understand signal strength. As its name implies, signal strength is the amount of signal emitted by a transmitter. Each transmitter is designed to transmit at a constant signal strength, so different makes, models, and lengths of transmitters will transmit at different strengths.
You can think of signal strength like volume. The receiver “listens” to the transmitter, determines how “loud” it is, and provides a numerical value for that volume. The louder the “sound,” the further away you can “hear” it. As you move away from the transmitter, the signal strength therefore decreases and increases again as you move towards it.
The signal strength scale is arbitrary, but values between 0 and 1200 are common for receivers.
What is Calibration?
Since properly functioning transmitters broadcast signal at a constant strength, the signal received at any distance from the transmitter can therefore be equated to a distance. In other words, signal strength equals depth.
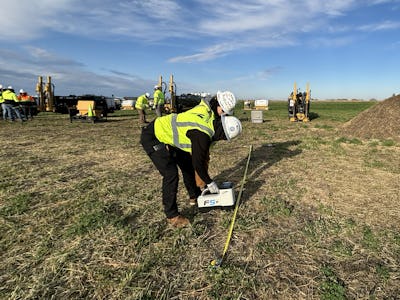
And that is what calibration does: by measuring the signal strength at a known distance—typically 10 ft (or 3 m)—the receiver during calibration assigns that distance to that signal strength.
For example, let us assume that the signal strength during calibration at 10 ft was 670 points. From then on, any time the receiver measures 670 points of signal, it will display a depth of exactly 10 ft.
Essential Calibration Practices
An accurate calibration is the key to a successful job—and there are a few keys to an accurate calibration:
- Calibrate in an area free of active interference. Reading the signal strength with the transmitter turned off will identify this interference.
- Calibrate in an area free of passive interference, such as reinforced concrete, adjacent metal structures, or the drill rig itself.
- Calibrate with the transmitter in the housing, since the housing will impact your signal strength.
- Follow the locating system manufacturer’s instruction on how the 10 ft (3m) are measured, commonly from the center of the transmitter housing to the closer inside edge of the receiver
- Know your signal strength! Ensure that the signal strength is the one expected and is not fluctuating.
- Calibrate both selected frequency bands
- After calibration, check the depth reading at a different distance. We recommend the maximum depth at which you expect to be drilling. If that depth reading is off, something has affected the calibration, and you may need to repeat the calibration in a different area.
- Check your calibration before every bore
- And this is important: Do not calibrate before every bore. Only calibrate if your receiver, transmitter, or housing have changed. More in the next section.
When Should You Calibrate?
As we described above, calibration involves measuring signal strength from a transmitter in a housing with a receiver. Although most manufacturers do a good job of producing transmitters with a consistent signal strength and receivers that measure that signal in a consistent manner, when any of the three—transmitter, receiver or housing—are changed, it may be necessary to calibrate. This is of course true the first time a transmitter, receiver, or housing are being used. Other times you must calibrate are:
- When you change from one transmitter to another (for example, from standard to long range) and from one receiver to another.
- If you change from one transmitter housing to another.
- If your receiver does not read the correct depth after you have ensured that you are not in a high electrical interference area or near metal objects.
Other Best Practices
A correctly performed calibration in the properly chosen area is key to achieving the accuracy you rely on from your locating system. There are, however, additional things to pay attention to:
- It is crucial to make sure you choose the optimum frequencies for your job site. A good calibration will not help when interference affects the transmitter signal.
- Ensure your depth calculations based on pitch match the receiver's depth readings. A 10 ft (3 m) rod drilled at –10% should add 12” (30 cm) to your depth, assuming flat ground.
- If the receiver depth does not match your calculations, make sure that the signal strength looks correct, that the drill head has been correctly located, and you are accounting for differences in elevation.
- Having a bore plan is an excellent way of checking your pitch and depth readings. When you compare them against your bore plan, any deviations will be obvious.
Resources
There are plenty of resources from all the locating system manufactures in the form of manuals, instructional videos, as well as other training sessions. Digital Control Incorporated’s digital manual app DigiGuide or calibration YouTube videos can help you get started.